
Photoelectric installation guide
How to Install a Photoelectric Sensor Correctly: From Optical Path to PLC Signal
A reliable installation is not just three wires and a bracket. First match the sensing mode to the real target, then build a rigid optical path, follow the exact model wiring diagram, align or teach with production parts, and validate the complete signal path at operating speed.
- Through-beam, retro-reflective, diffuse and BGS
- PNP, NPN, light-on and dark-on checks
- Alignment, pulse timing and commissioning
This guide covers industrial photoelectric object sensors connected to a machine controller. A dusk-to-dawn AC lighting photocell is a different product category with different terminals, mounting rules and electrical-code requirements. Never apply a generic black/red/white lighting-photocell diagram to an industrial sensor.
The correct sequence
Install in five controlled stages.
Each stage removes a different failure source. Do not tune the sensitivity to compensate for the wrong sensing mode, a flexible bracket or an incompatible PLC input.
Define the target
Record material, color, transparency, size, speed, path variation and background.
Select the mode
Choose through-beam, retro-reflective, diffuse, BGS or a specialized optical solution.
Mount the optics
Build a rigid, serviceable beam path with enough adjustment and lens access.
Wire and configure
Use the exact datasheet for voltage, pinout, output type and operating logic.
Validate the system
Test real targets, worst positions, operating speed, background and PLC logic.
Before choosing hardware
Describe the detection task before opening the toolbox.
The rated sensing distance is meaningful only with the sensing method, standard target, reflector and test conditions stated by the manufacturer. Reflective-mode performance can change with target size, color, gloss and angle; even the usable background-suppression boundary depends on the selected model and target reflectivity.[1]
Use a worst-case part, not a hand or white card, during selection and commissioning. The sensor must recognize the smallest, darkest, clearest, fastest or most mispositioned product that the line will actually run.
- Target: material, finish, color, transparency, dimensions and orientation.
- Motion: speed, minimum gap, trajectory variation and stopping behavior.
- Geometry: sensor-to-target distance, available opposite-side access and background position.
- Environment: dust, water, oil mist, cleaning chemicals, vibration, sunlight and temperature.
- Control: supply, PNP or NPN input, light-on or dark-on logic, connector and required response.
Step 1: choose the optical layout
The sensing mode determines the mounting and alignment work.
Through-beam detects interruption between a separate emitter and receiver. Retro-reflective uses one sensor body and an opposing reflector. Diffuse and background-suppression sensors receive light returned by the target.[1]
| Sensing mode | Mounting layout | Good starting use | Installation risk to control | Commissioning proof |
|---|---|---|---|---|
| Through-beam | Emitter and receiver on opposite sides; both must be supported and normally wired. | Opaque targets, wider gaps, difficult colors and applications needing strong optical contrast. | Two-sided access, optical-axis drift, adjacent-sensor crosstalk and beam larger than the target. | Map the stable receive window, center both axes and block the beam with every valid target. |
| Retro-reflective | Sensor on one side, specified reflector on the other; wiring is typically on one side. | Conveyors and gates where a reflector fits but receiver wiring is inconvenient. | Wrong reflector, poor centering, shiny-target false return and clear-object attenuation too small. | Verify reflector reserve, then pass the real object through every part of the beam. |
| Diffuse reflective | One sensor points at the target and detects returned light. | Shorter, simple presence tasks with stable target surfaces and no confusing background. | Color, gloss, angle and size can shift the switching point; background may also return light. | Test the darkest and brightest target positions plus the empty background. |
| Background suppression | One sensor uses optical geometry or distance information to reject objects beyond a set boundary. | Targets in front of a nearby machine wall, belt or fixture. | Cutoff transition, target reflectivity, foreground dead zone and mounting-angle limitations. | Teach or set with the real target and prove that every allowed background remains ignored.[2] |
| Specialized clear-object / fiber optic | Model-specific optics, reflector or remote fiber head selected for a narrow task. | PET, glass, transparent film, very small parts, restricted space or precise sensing points. | A standard sensor may not create enough signal change; sensitivity can drift with contamination. | Run sample testing with minimum wall thickness, seams, labels, moisture and normal cleaning state. |
Do not copy a sensing distance from another family. Select the exact model from its rated distance, response, beam/spot data, target conditions and environmental ratings.
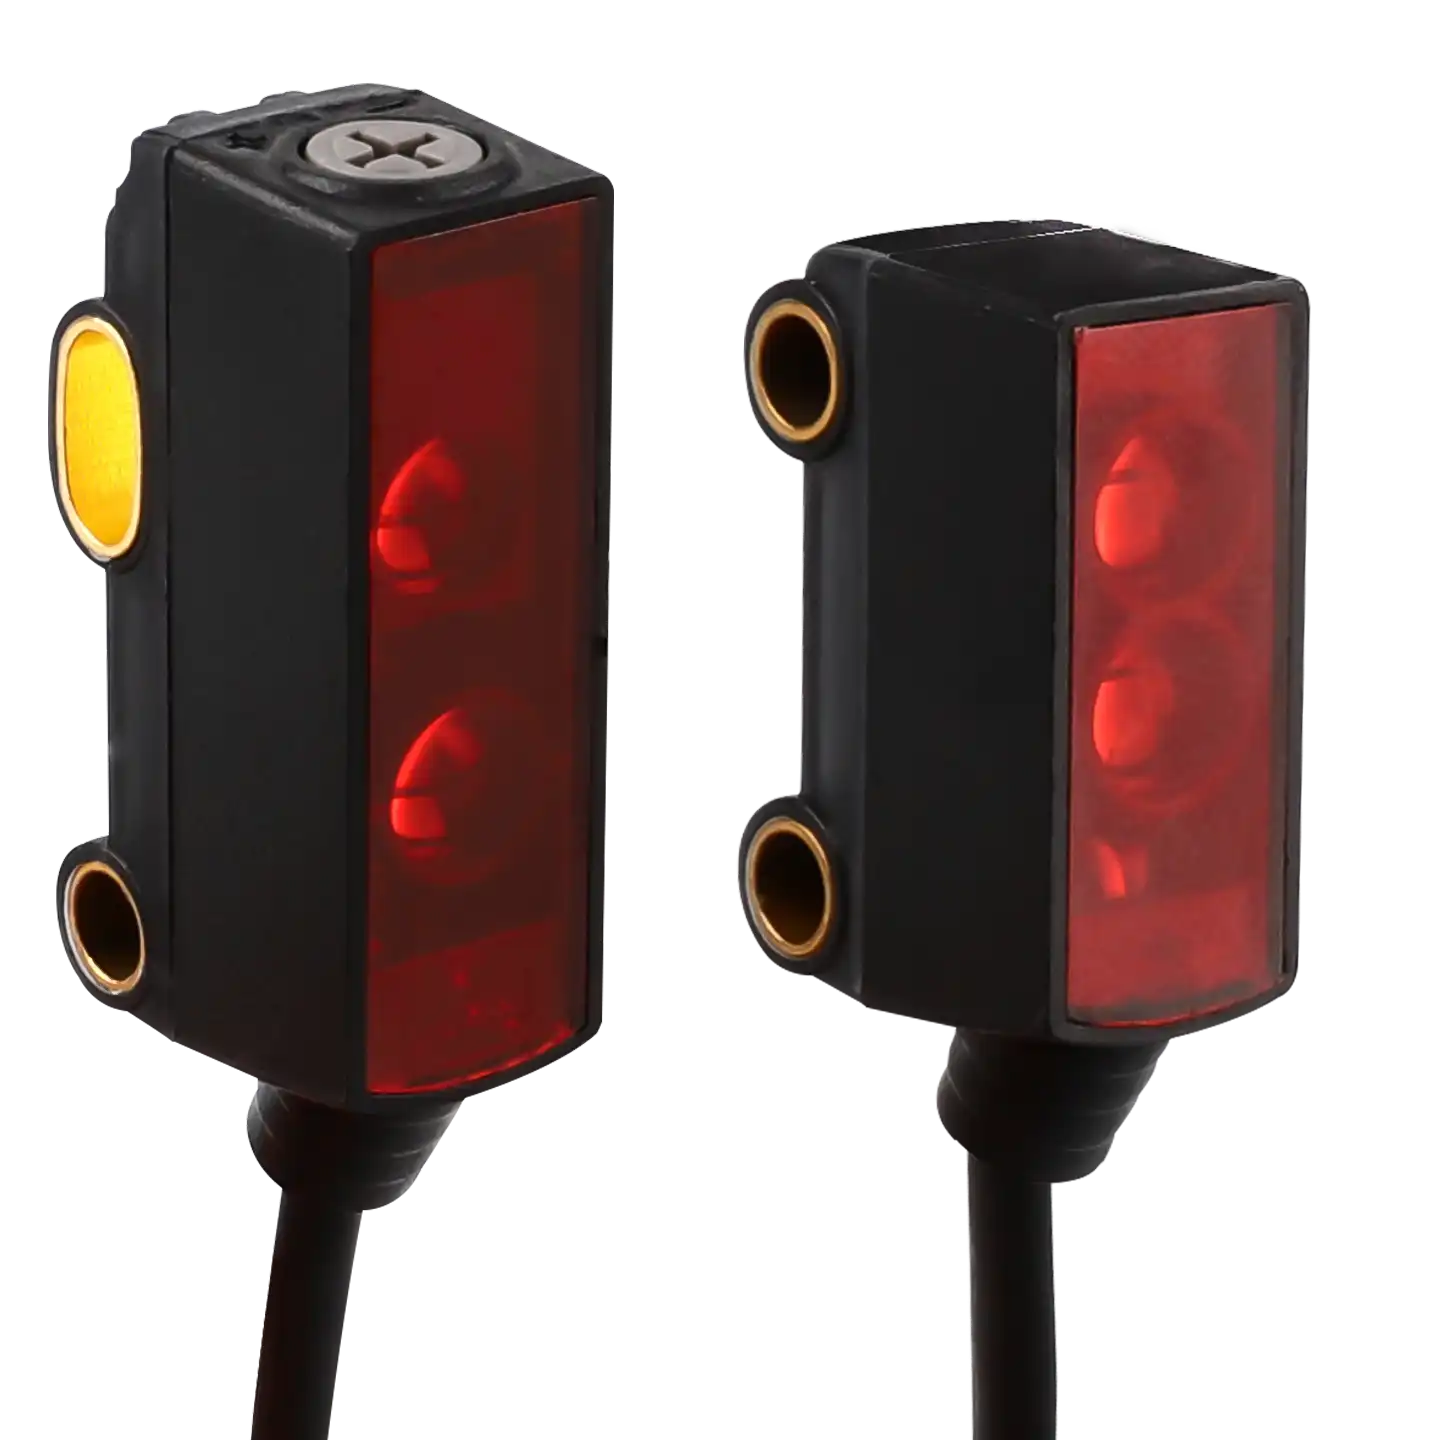
Read the exact model sheet
“Photoelectric sensor” is not a wiring specification.
Two sensors in similar housings can have different supply ranges, output circuits, pin assignments, light-on/dark-on behavior, teach procedures, indicator meanings and protection functions. Record the complete part number before installation and keep its operating instructions available at the machine.
Compare XSZ photoelectric sensing modes before fixing the machine layout.
Step 2: mechanical installation
Build a stable optical path before adjusting sensitivity.
A sensor cannot electronically correct a bracket that moves, a reflector that twists, a target that misses the beam or a cable that pulls the housing out of alignment.
Choose a rigid reference
Mount the sensor and its receiver or reflector to machine structure that does not move independently under normal vibration or product impact.
Keep adjustment travel
Provide controlled horizontal and vertical movement for alignment, then a repeatable method to lock the bracket without rotating it.
Place the beam deliberately
Cross the target where every valid part blocks or reflects enough light. Avoid holes, handles, bottle necks and wandering edges unless they are intentional.
Protect the optical face
Keep the lens outside impact paths and standing liquid. Leave access for inspection and cleaning without losing alignment.
Manage the cable
Respect the model cable bend radius, add strain relief and keep connectors free from side load, washdown traps and repeated flex unless rated for it.
Tighten to the manual
Use the specified bracket hardware and torque. Recheck optical alignment after the final tightening sequence.
Product contact can damage the lens, shift the beam and transfer impact into the cable or connector. Add a separate guide or guard when a part can strike the sensor.
Use the machine, not the air, as the reference
Mount for production variation and future service.
A clear line of sight during commissioning is not enough. Check the optical path with guides, guards, covers, labels, product accumulation and maintenance access restored. The beam must remain useful after the machine returns to its normal state.
- Confirm the smallest product still intersects the effective beam.
- Confirm machine frames and guides cannot become an unintended reflector.
- Keep nearby emitters outside the receiver path or use the model's interference-prevention method.
- Mark the final bracket position so movement is visible during maintenance.
- Keep a replacement path that does not require rebuilding the machine frame.

Step 3: alignment and teach
Find the center of a stable operating window, not just the first LED change.
Indicator meanings differ by model: one LED may show power, output, stability, received-light level or teach status. Read the operating instructions before interpreting a color or flash pattern. A SICK retro-reflective example, for instance, uses a model-specific continuous/flashing indication during alignment and requires a functional test after alignment.[3]
Through-beam pair
- Mount emitter and receiver approximately on the same optical axis.
- Power the pair according to the exact diagram and observe the manual's receive/stability indication.
- Sweep one unit slowly left-to-right and identify both edges of stable reception.
- Center between those edges, then repeat the sweep vertically.
- Lock hardware gradually, recheck both axes and block the beam with the real minimum target.
Retro-reflective
- Install the specified reflector within its rated geometry and orientation.
- Aim the sensor at the reflector center and scan horizontally and vertically.
- Lock at the center of the stable return window, not at an edge.
- Pass the real target through the full beam at its nearest and farthest paths.
- For shiny or clear targets, verify the dedicated polarization or clear-object function.
Diffuse or BGS
- Place the most difficult valid target at its intended sensing position.
- Use the model's teach or adjustment sequence; do not assume every potentiometer sets distance.
- Test target-present and target-absent states across all position variation.
- For BGS, prove the actual background remains outside the accepted region.
- Repeat with light/dark, glossy/matte and clean/normal lens conditions as applicable.
Possible controls include separation, alternating emitter/receiver orientation, optical barriers, sensitivity adjustment or an interference-prevention function. Use only the methods and spacing supported for the selected sensor; OMRON's guidance shows that the permitted arrangement depends on the model and accessory.[4]

Target-specific installation
Clear, dark, shiny and fast targets need different evidence.
Do not solve a difficult target by turning sensitivity to an arbitrary maximum. A reliable solution changes the optical geometry, sensing principle or model so the valid target produces a repeatable signal difference from the empty state.
Specialized clear-object retro-reflective sensors are designed for the small attenuation created by glass, PET or film, while a standard high-gain through-beam pair can sometimes transmit too much light through a transparent target.[5] Final selection still requires testing the actual object.
Glass, PET and film
Start with a clear-object model or an application-tested retro-reflective solution. Test the thinnest wall, seam, label gap, wet surface and normal contamination. Do not assume a standard diffuse sensor will be stable.
Black rubber, foam and dark cartons
Through-beam avoids depending on target reflectivity. If one-sided mounting is required, compare BGS or distance-based models using the darkest sample and the farthest allowed target position.
Polished metal and glossy packaging
A mirror-like return can imitate a reflector or redirect light away from a diffuse receiver. Investigate polarized retro-reflective, through-beam or suitable distance-based sensing and test all target angles.
Pins, edges and high-speed products
Confirm the effective beam or spot is smaller than the detectable feature. Then compare the output pulse with sensor response, PLC input filtering, scan time and counter capability.
Step 4: electrical installation
Follow the exact sensor diagram and the exact controller input circuit.
Electrical work must be performed by qualified personnel under the machine's isolation and verification procedure. Confirm the full part number, supply, output circuit, load limits, connector pinout and input common before making a connection.
- SupplyUse only the voltage range and polarity printed for the selected model. Similar housings may be DC, AC/DC or relay-output variants.
- PNP or NPNMatch the sensor output to the PLC input architecture. Review NPN vs PNP sensor wiring before ordering or replacing a model.
- Light-on / dark-onThis describes output behavior relative to received light, not a universal “target present” state. The meaning changes with sensing mode. Compare NO vs NC sensor output.
- Connector pinoutM8 and M12 pin assignments are model-specific. Read the wiring diagram even when the connector physically fits; see the M12 sensor connector pinout guide.
- Load and protectionCheck output current, residual voltage, leakage current, short-circuit protection and inductive-load instructions before driving anything other than a compatible input.
- Cable routeSeparate sensor wiring from power conductors and VFD motor leads according to the equipment EMC plan. Use shielding and grounding only as specified for the complete system.
An ordinary sensor does not include the redundant, self-checking safety architecture required for personnel protection. Use a safety-rated system selected and validated for the machine risk assessment.[6] Selecting dark-on or normally closed logic does not convert a standard sensor into a safety device.
Verify the complete signal path
The output LED and the PLC input are separate checkpoints.
If the sensor's output indication changes but the PLC input does not, investigate the output type, input common, connector pinout, broken conductor, input filtering and load compatibility. If the optical or stability indication does not change, investigate the target, beam path, teach setting, contamination and alignment first.
Do not diagnose a transistor output by expecting a universal “24 V when on” reading. The measured value depends on PNP/NPN topology, the connected load, leakage, residual voltage and test reference. Use the model circuit and the PLC input diagram together.
Application starting point
Choose your most difficult target condition.
This selector suggests what to investigate first. It is not a model guarantee; confirm the final choice with actual samples, geometry, speed and environment.
What must the sensor detect?
Starting route
Start with through-beam or retro-reflective sensing
An opaque target can create a clear beam interruption. Choose through-beam when two-sided wiring and stronger optical contrast are acceptable; choose retro-reflective when a reflector fits and one-side wiring is more practical.
Small and fast target check
Estimate whether the output pulse can reach the PLC.
A sensor may detect optically yet still produce a pulse too short for the controller to register. Compare the approximate time that the target effectively blocks the beam with the sensor response, any on/off delay, input filter, PLC scan or high-speed counter behavior.
blocking time (ms) ≈ effective blocking travel (mm) ÷ target speed (m/s)
“Effective blocking travel” is the distance the moving target keeps the required portion of the beam interrupted. It is not always the full object length: beam diameter, target holes, angle and sensing mode can shorten the useful pulse. Confirm the estimate with the actual output waveform or controller diagnostics.
Pulse-window estimator
Step 5: commissioning
Prove the installation under production conditions.
A single hand test confirms very little. Acceptance should cover the optical state, electrical output, controller input and resulting machine behavior with real products and foreseeable variation.
Confirm the configuration
Record full part number, sensing mode, reflector or fiber, supply, PNP/NPN, logic and teach setting.
Test target extremes
Use minimum size, darkest/clearest surface, maximum position variation and every approved product format.
Test the empty state
Run without product and with the real background, guides, belts, reflectors and machine lighting in place.
Run at operating speed
Verify the PLC tag, counter and machine sequence; inspect missed pulses and duplicate edges.
Challenge likely disturbances
Check vibration, neighboring emitters, sunlight or work lights, normal lens condition and cable movement.
Capture the baseline
Save settings, alignment marks, PLC state, photos and a representative good/bad target for maintenance.
If the target material, reflector, distance, mounting frame, line speed, input filter or environment changes, repeat the relevant validation.
Fault isolation
Separate optical faults from wiring and logic faults.
Use the exact indicator definitions and controller diagnostics. The table below gives an investigation order, not a substitute for the model manual or safe electrical procedures.
| Observed symptom | Check first | Likely installation causes | Controlled next action |
|---|---|---|---|
| No power indication | Supply at the correct pins under the approved safe test procedure. | Wrong voltage, polarity, connector pinout, open conductor or protection trip. | Compare the exact model diagram with the field cable and panel terminals before replacing the sensor. |
| Optical state never changes | Mode, target path, lens condition, emitter operation, reflector and alignment. | Target misses beam, wrong reflector, excessive distance, wrong teach state or unsuitable mode. | Return to mechanical alignment using the real target; do not compensate blindly with sensitivity. |
| Sensor changes, PLC does not | Output type, input common, pinout, controller status and configured input filter. | PNP/NPN mismatch, wrong output wire, broken cable, incompatible load or controller configuration. | Trace the signal from sensor output to connector, terminal, input channel and PLC tag. |
| Random switching when empty | Background reflections, adjacent emitters, sunlight/work lights, vibration and loose hardware. | Crosstalk, specular return, unstable bracket, background inside cutoff or contaminated optics. | Change one variable at a time and use the model-supported interference or background-control method. |
| Misses some products | Which color, position, seam, label, speed or target size correlates with the miss. | Mode depends on reflectivity, beam is too large, pulse too short or product path varies. | Test the worst sample, review beam geometry and timing, then select a more suitable sensing method if needed. |
| Works clean, fails later | Lens/reflector condition, alignment marks, bracket movement and process contamination. | Insufficient optical margin for the real environment, cleaning damage or maintenance interval too long. | Restore and document the baseline, then change protection, mounting or model rather than repeatedly retuning. |
For a broader diagnostic flow, use the industrial sensor troubleshooting guide.
After commissioning
Make the next replacement repeatable.
The most useful maintenance record captures what was installed, what “good” looked like and which application limits were actually tested.
Record
- Full sensor and reflector part numbers
- Supply, output type and operating logic
- Teach value or adjustment position
- PLC channel, tag and input-filter setting
Mark
- Bracket and reflector alignment positions
- Target path and intended beam crossing point
- Cable and connector route
- Protected lens-cleaning method
Maintain
- Inspect at an interval based on contamination
- Use lens-compatible cleaning materials
- Recheck alignment after impact or bracket work
- Repeat validation after application changes

- Good installation evidence: the sensor detects every approved target at the full allowed position range.
- Good electrical evidence: each optical transition reaches the intended PLC tag with the required logic.
- Good timing evidence: the controller captures the shortest real output pulse at maximum process speed.
- Good maintenance evidence: settings and alignment can be restored without trial-and-error retuning.
Application review
Send XSZ the target, geometry and controller data.
XSZ can narrow the sensing method and configuration before you cut a bracket or cable. A target photo, measured distance, line speed and PLC input type make the recommendation far more useful than a generic sensing-range request.
Installation questions
Photoelectric sensor installation FAQ
How do you install a photoelectric sensor correctly?
Define the real target and environment, select the correct sensing mode, mount a rigid optical path, wire the exact model to a compatible controller input, align or teach according to its manual, and validate with worst-case products at operating speed. Document the settings and alignment after acceptance.
What is the correct wire color for a photoelectric sensor?
There is no universal color rule that replaces the model diagram. Many IEC-style DC sensors use brown for positive supply, blue for 0 V and black for output, while white may provide a second output or another function. AC lighting photocells use different conventions. Always follow the complete part number's wiring diagram.
How do you align a through-beam photoelectric sensor?
Roughly align the emitter and receiver, then use the model's receive or stability indication while sweeping horizontally to find both edges of stable reception. Lock at the center, repeat vertically, tighten gradually and recheck. Finish by interrupting the beam with the smallest real target across its full travel path.
How do you align a retro-reflective photoelectric sensor?
Install the specified reflector within the model's rated geometry, aim at its center and scan horizontally and vertically to find the stable return window. Lock at the center, then pass the actual target through the complete beam. Clear or shiny targets may require a dedicated clear-object or polarized model.
Can a standard photoelectric sensor detect transparent bottles?
Sometimes it produces a signal change, but it may not be stable across wall thickness, seams, labels, moisture and contamination. Start with a specialized clear-object solution or an application-tested optical arrangement, and validate actual minimum-change samples rather than relying on a generic range rating.
Should I choose PNP or NPN output?
Choose the output that matches the PLC or controller input circuit. PNP sources current to a compatible sinking input; NPN sinks current from a compatible sourcing input. Do not choose by region or wire color. Confirm the input common, diagnostic requirements and replacement standard for the machine.
Can two sensor outputs be connected to one PLC input?
Do not simply parallel or series transistor outputs unless both sensor and controller manufacturers explicitly support that circuit. Output interactions, leakage current and fault behavior can make the result unreliable. The usual controlled approach is to use separate PLC inputs and implement the required AND/OR logic in the controller or an approved interface.
Can a normal photoelectric sensor protect personnel?
No. A standard object-detection sensor is not a personnel-safety device and generally lacks the redundant, self-monitoring architecture required for safeguarding. Use a safety-rated light curtain or other safety system selected through the machine risk assessment and validated to the applicable requirements.
Evidence and media
Technical references
- OMRON Industrial Automation, Overview of Photoelectric Sensors — sensing principles, classifications and selection factors.
- Rockwell Automation, 42CE RightSight C18 Installation Instructions — a model-specific example of BGS cutoff adjustment and wiring diagrams.
- SICK, GL6(G) Retro-reflective Sensor Operating Instructions — model-specific reflector alignment, indication and functional testing.
- OMRON, Mutual Interference Prevention for Through-beam Sensors — model-dependent spacing, arrangement and filter methods.
- ifm, Photoelectric Sensor Technology by Application — through-beam, retro-reflective and clear-object application considerations.
- Banner Engineering, Q45XDN Photoelectric Sensor Manual — explicit warning that a standard sensor is not for personnel protection.
Image credits
- Hero factory conveyor: Frans van Heerden / Pexels.
- XSZ product image: XSZ Sensor.
- Industrial conveyor: Mark Stebnicki / Pexels.
- Bottling line: Vladimir Srajber / Pexels.
- Control panels: Shameer Vayalakkad Hydrose / Pexels.
- Bottling equipment: Pexels.