Bottle detection application guide
Sensor for Bottle Detection: Choose by Bottle, Task, and Line Speed
The best sensor for a bottle line depends on what must be detected. Counting a clear PET bottle, detecting a glass bottle gap, verifying liquid level, checking a cap, and inspecting a label are different sensing jobs.
Presence, count, gap, jam, level, cap, label, shape, and defect inspection need different evidence.
Material, color, curvature, seams, ribs, liquid, foam, label, condensation, and wobble can change the signal.
Confirm one- or two-side access, reflector space, guide-rail position, mounting rigidity, and background.
Use bottle pitch and conveyor speed to check the sensor, input filter, PLC, and reject timing as one chain.
Start with the decision, not the catalog
A “bottle detection sensor” is not one universal product.
A bottle can be easy for one sensing principle and difficult for another. An opaque bottle interrupts a photoelectric beam clearly. A transparent PET or glass bottle may transmit most of that beam, bend it through curved walls, create moving highlights, and change again when filled, labeled, capped, wet, or cold.
The machine also determines what success means. A conveyor counter needs one clean pulse per bottle. A filler needs confirmation that a container is correctly seated. An accumulation zone needs continuous occupancy or gap information. A quality station may need to classify cap height, label position, fill level, or bottle damage rather than return a simple ON/OFF state.
Therefore, specify the event, target states, sensing path, timing window, environment, and control interface before selecting range or housing size. This keeps the project focused on repeatable production performance instead of a bench test with one clean bottle.

One line, several sensing jobs
Separate bottle presence from level, closure, and quality inspection.
This task map prevents a common selection error: asking one sensor to solve several unrelated inspection conditions without defining which result controls the machine.
Count or trigger
Generate one reliable output as each bottle reaches a filler, capper, labeler, camera, diverter, or packing station.
Starting methods: photoelectric or opposed ultrasonicGap and accumulation
Recognize minimum spacing, continuous product, a blocked conveyor, an empty zone, or a bottle queue.
Starting methods: beam-break sensor, array, or zone logicSeated or fallen bottle
Verify that the bottle is upright, inside a pocket, under a filling head, or correctly located before motion.
Starting methods: two sensing heights, array, vision, or fixture sensingFill-level check
Distinguish empty, low, normal, or overfilled conditions through or above the container while managing foam and bubbles.
Starting methods: capacitive, optical/fiber, ultrasonic, or visionCap and label presence
Confirm a cap, foil, tamper band, label, registration mark, or simple height condition.
Starting methods: photoelectric, inductive for metal, color mark, or visionOrientation or defect
Evaluate multiple features such as cap seating, label position, bottle shape, surface condition, print, or seal quality.
Starting method: machine vision with controlled lightingApplication selector
Choose a starting sensing method for your bottle line.
Select the closest task. The recommendation is a practical starting point, followed by the conditions that must be verified on the actual machine.
What must the system detect?
Recommended starting point
Dedicated transparent-object photoelectric sensor
A transparent-object retro-reflective arrangement is a common starting layout because it evaluates a controlled light path from a reflector and is designed to recognize the small attenuation caused by a clear container.
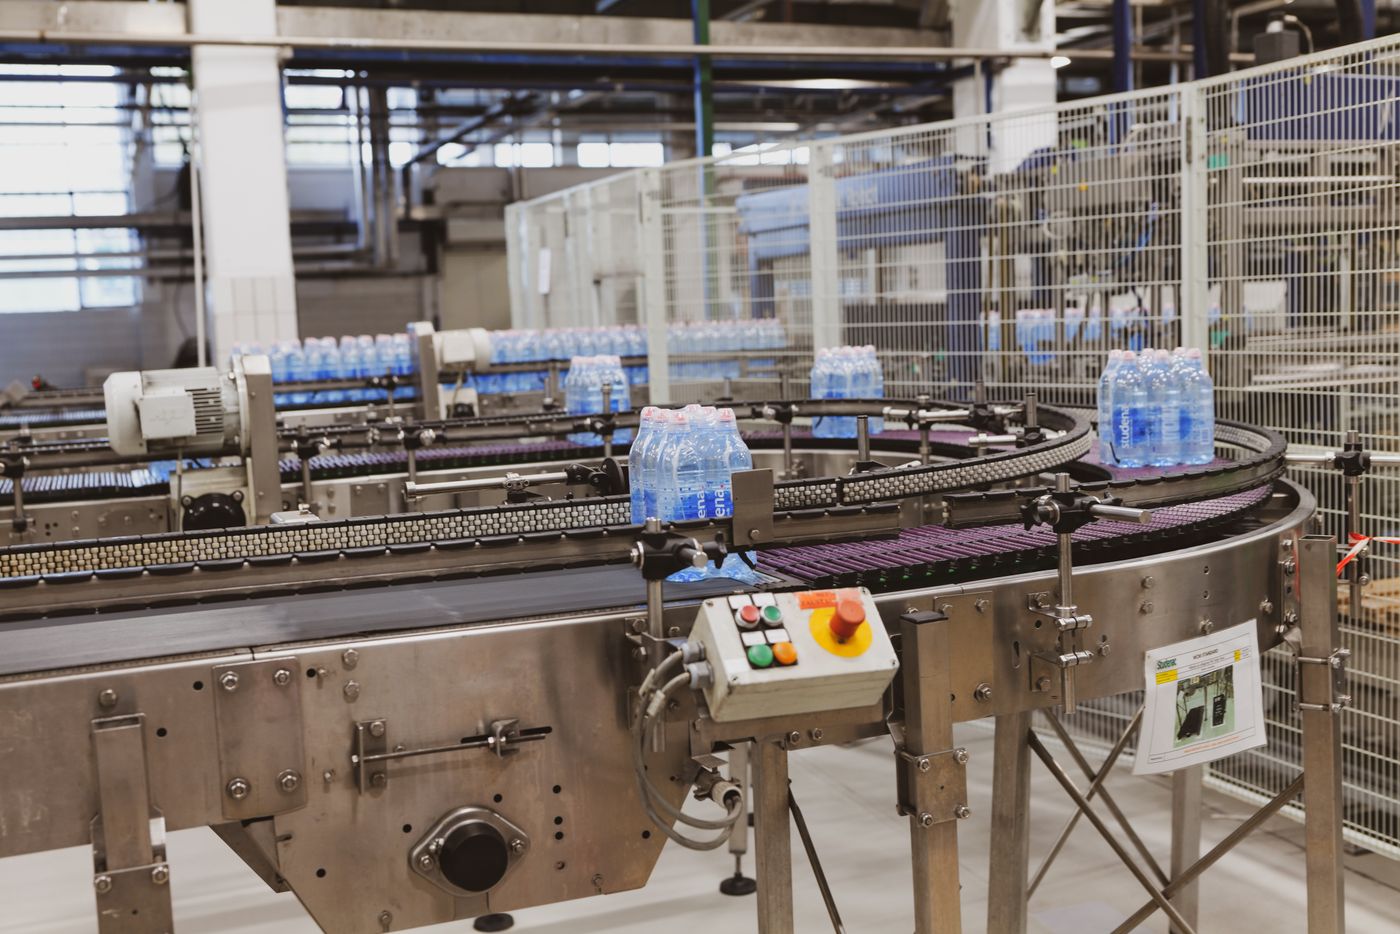
Transparent PET and glass
A clear bottle is difficult because the beam is weakened, redirected, and reflected at the same time.
There is no useful universal transmission percentage for all clear bottles. Resin, glass composition, wall thickness, color, liquid, curvature, ribs, seams, labels, and surface moisture all change the optical result. A setup that detects one empty PET bottle may lose margin on a smaller, clearer, wetter, or differently shaped SKU.
A dedicated transparent-object photoelectric sensor is designed to react to a smaller change than an ordinary opaque-object sensor. Many clear-container applications use a reflector so the receiver has a defined reference path. Some designs add coaxial optics, polarization, compensation, or specialized evaluation. These are product-specific methods, not accessories that make every standard sensor equivalent.
Bottle sensor comparison
Compare the sensing principle against the real bottle and machine layout.
No row is a universal winner. Use the “must verify” column as the acceptance-test plan for the selected method.
| Sensing method | Good starting applications | Main advantage | Main limitation | Must verify on the line |
|---|---|---|---|---|
| Transparent-object retro-reflective | Clear PET or glass presence and counting with reflector access. | One-side electrical wiring and a controlled optical return path. | Small signal change can be affected by bottle lensing, labels, reflector contamination, or alignment. | Exact reflector, teach procedure, every SKU state, minimum gap, response, cleaning, and margin. |
| Through-beam photoelectric | Opaque or translucent bottle counting, long range, and layouts with access on both sides. | Strong optical path and clear beam interruption for suitable targets. | A standard model may not see enough attenuation from a transparent bottle. | Transparent-object capability, emitter/receiver alignment, beam spot, vibration, gap, and cable access. |
| Diffuse or background suppression | Opaque or colored bottles when one-side mounting and a stable target return are available. | No reflector or opposite-side receiver; background suppression can reject surfaces behind the target. | Color, gloss, curvature, angle, distance, and wet surfaces can change the return. | Every color and finish, closest/farthest position, background distance, angle, and ambient light. |
| Opposed ultrasonic | Clear or mixed-material bottle presence where an acoustic emitter and receiver can face each other. | Detection does not depend on bottle color or optical transparency. | Beam width, dead zones, response, nearby structure, spacing, airflow, and contour can limit the application. | Minimum gap, bottle neck/body geometry, speed, mounting path, machine reflections, and response timing. |
| Capacitive proximity | Point level through a non-metal bottle wall or close-range material-state detection. | Responds to dielectric change rather than visible contrast. | Wall, liquid, foam, residue, moisture, surrounding metal, grounding, and sensitivity affect the result. | Empty/full/foam states, wall thickness, product recipe, buildup, temperature, mounting, and recalibration need. |
| Fiber optic sensor | Narrow bottle necks, small gaps, tight machine spaces, or small optical targets. | Moves a compact sensing head into a restricted area while the amplifier remains accessible. | A small fiber tip does not automatically solve transparent-object contrast, range, contamination, or bending. | Head mode, spot, amplifier setting, bend radius, mounting, sample contrast, response, and cleaning. |
| Machine vision | Cap seating, label location, orientation, shape, fill height, seal, print, or multiple conditions. | Evaluates position, pattern, geometry, and several features in one inspection. | Requires controlled lighting, optics, triggering, recipe management, processing time, and validation. | Defect definition, field of view, resolution, motion blur, line speed, reject tracking, changeover, and false-reject rate. |
Inductive proximity sensing is useful only when the target feature is metal, such as a metal cap, foil, or fixture. It does not detect the PET or glass bottle body.
Line-speed calculator
Convert bottles per minute into a real detection window.
Throughput alone does not define required response time. Bottle pitch determines conveyor speed, while the minimum visible gap determines how long the sensor can distinguish two adjacent bottles.
Enter line conditions
speed = BPM × pitch ÷ 60gap window = gap ÷ speed × 1000
Calculated process window
The entered sensor and control delay fit inside the geometric gap window. Preserve additional margin for wobble, beam size, output off-delay, PLC scan variation, acceleration, and mechanical tolerance.
Bottle construction changes the signal
Test the worst optical and mechanical state in every SKU family.
A catalog description such as “glass,” “PET,” or “colored bottle” is too broad for production approval. Build the sample set around the condition most likely to reduce margin or cause an extra transition.
Clear PET
Thin curved walls, ribs, molded seams, neck geometry, liquid, bubbles, label edges, condensation, and squeeze deformation can change attenuation and lensing.
Test: clearest, smallest, wettest, fastest, and most unstable bottle position.Clear or tinted glass
Wall thickness, curvature, embossing, tint, reflection, fill, and chipped or irregular edges can create different optical paths.
Test: empty and filled glass, tint range, seam orientation, surface moisture, and bottle-to-bottle variation.Colored or opaque plastic
Diffuse return can vary with pigment, gloss, texture, curvature, and distance even when the bottle appears consistently opaque to the eye.
Test: darkest and lightest colors, matte and glossy finishes, farthest position, and moving highlights.Reflective or decorated bottle
Metallic labels, foil, shrink sleeves, high-gloss surfaces, transparent windows, print, and cap materials can add or remove transitions.
Test: label seams, foil edges, rotating orientation, wrinkles, missing decoration, and the intended detection height.Mounting geometry
Place the sensing path where the bottle gives one stable transition.
The correct sensor can still double-count or miss bottles when the beam crosses an unstable neck, embossed seam, label edge, guide rail, glossy machine surface, or a gap that disappears during accumulation.
Choose a repeatable bottle zone
Aim through a body area that remains present and mechanically stable across all approved bottles. Avoid optional label windows, changing neck profiles, and decorative features unless they are the intended target.
CHECK: height tolerance and SKU changeoverControl the reference path
Keep emitter, receiver, reflector, or background rigid and unobstructed. Prevent rails, guards, filler heads, spray, foam, or a second bottle lane from entering the sensing field.
CHECK: bracket deflection and background movementMatch the beam to the gap
The effective optical or acoustic field must clear the minimum gap between bottles. A wide field may bridge the gap even when the electronic response is fast enough.
CHECK: spot or beam width at installed distanceSeparate count and jam logic
A single pulse point can count individual bottles, but a jam or downed bottle may require a second height, area sensor, timer, encoder tracking, or multiple zones.
CHECK: touching bottles and fallen-bottle statesDesign for cleaning
Provide access to the lens and reflector, route cables away from chemical pooling, and protect the bracket from impact. The enclosure rating must match the exact cleaning process and chemicals.
CHECK: washdown, condensation, residue, and materialsValidate in motion
Run minimum and maximum speed, acceleration, vibration, bottle wobble, empty and full containers, realistic spacing, starts, stops, and accumulation. Bench alignment alone does not expose these transitions.
CHECK: misses, double counts, and signal margin
Liquid level through or above the bottle
Choose the fill-level method by liquid, wall, foam, speed, and inspection tolerance.
A sensor that reliably counts the bottle body does not automatically distinguish the liquid surface. Conversely, a point-level sensor may verify one height but cannot prove cap position, exact fill volume, or the entire bottle shape.
For a moving bottle, the level inspection may also need a separate bottle trigger or a timing window so the amplifier, camera, or controller evaluates the correct part of the container. Foam, bubbles, sloshing, condensation, label coverage, wall variation, and product recipe should be included in the validation set.
Cap, label, orientation, and quality
Use the simplest sensor that can prove the required condition.
A discrete sensor is efficient for one stable feature. Vision becomes appropriate when the decision depends on location, orientation, shape, print, seal, or several conditions at once.
Cap at a known height
A photoelectric sensor can check a stable cap silhouette or height when bottle position and cap geometry are controlled.
Validate missing, loose, tilted, wrong-color, and partially seated caps.Metal cap or foil
An inductive sensor can detect the metal feature without depending on bottle color, but it does not confirm the PET or glass body.
Validate metal composition, size, gap, orientation, and surrounding metal.Label or printed mark
A color-mark or contrast sensor can detect a repeatable mark when color contrast, distance, web or bottle position, and speed are controlled.
Validate every artwork, ink, gloss, label lot, background, and rotation state.Upright or downed bottle
Two detection heights, a light array, or vision can distinguish the intended body profile from a fallen, leaning, or missing container.
Validate crowded bottles, partial blockage, guides, and all failure orientations.Cap and label inspection
Vision can check cap location, label presence and alignment, orientation, print, and other visible features in one station.
Define defects quantitatively and test borderline samples, not only obvious failures.Inspection is only the first step
The controller must associate the result with the correct bottle through conveyor motion, buffering, acceleration, and the reject mechanism.
Validate trigger, inspection, tracking, reject confirmation, and fault response together.Output and control integration
A stable sensor signal still has to survive wiring, input filtering, PLC logic, and reject timing.
Confirm supply voltage, output type, PNP or NPN compatibility, normally open or normally closed behavior, load current, connector pinout, cable length, input common, and any off-delay or one-shot logic. A fast sensor cannot compensate for an input filter or program condition that removes the available gap.
IO-Link can be useful when the selected model exposes signal values, diagnostics, teaching, counters, or parameter storage, but available data belongs to the exact device and its IODD. Do not assume every IO-Link sensor provides the same process data.

Commissioning workflow
Approve the bottle sensor with a production sample matrix.
The objective is not to prove that one bottle can switch the output. It is to demonstrate enough margin across all allowed products, positions, speeds, environments, and control states.
Define pass and fail
Write the exact event, required output state, acceptable switching zone, maximum missed or false detection rate, machine response, and fault behavior.
Build the sample set
Include every SKU and the worst clear, dark, glossy, small, large, empty, filled, labeled, unlabeled, wet, dry, foamy, and damaged conditions.
Fix the geometry
Install production brackets, reflector or receiver, guides, guards, cable routing, and cleaning access. Record distance, angle, height, and reference position.
Teach and record margin
Follow the exact model procedure. Record signal or stability indicators for clear path, worst bottle, dirty path, and borderline positions rather than storing only ON/OFF results.
Run dynamic tests
Use minimum and maximum speed, smallest gap, touching bottles, acceleration, stops, restarts, wobble, vibration, accumulation, changing ambient light, and realistic washdown residue.
Validate the full chain
Compare sensor output, PLC input, program tag, counter, machine action, reject tracking, confirmation, alarm, restart, and maintenance instructions before production release.
Bottle detection troubleshooting
Diagnose the signal at the target, sensor, PLC, and machine action.
Change one factor at a time and record the result. If the sensor indicator is stable but the PLC count is wrong, the fault is no longer only an optical or acoustic problem.
| Symptom | Likely causes | Checks to perform | Better correction |
|---|---|---|---|
| Clear bottle is missed | Ordinary sensor mode, insufficient attenuation, poor reflector, wrong teach, clear bottle zone, contamination, or changed SKU. | Compare signal with and without every bottle state; inspect alignment, reflector, lens, distance, seams, fill, moisture, and stability indication. | Use a documented transparent-object system, improve the reference path, teach the worst condition, or compare opposed ultrasonic geometry. |
| One bottle counts twice | Neck/body transitions, label edge, ribs, seam, reflective highlight, bottle wobble, or program edge logic. | Record the raw sensor waveform or high-speed PLC trace; move the beam through different bottle heights and orientations. | Aim through a stable body zone, narrow the field, stabilize bottles, or add appropriate edge/debounce logic without hiding the minimum gap. |
| Adjacent bottles become one | Gap smaller than beam, acoustic field bridges the gap, slow release, off-delay, input filter, or touching bottles. | Measure minimum physical gap and use the calculator; check beam size, response and release, output delay, PLC filter, and actual speed. | Reduce field size, change sensing geometry, improve bottle spacing, shorten valid filters, or select a faster suitable model. |
| False trigger after washdown | Water film, droplets, foam, lens or reflector residue, condensation, cable ingress, background reflection, or capacitive sensitivity shift. | Inspect signal before, during, and after cleaning; check materials, enclosure, connectors, mounting pockets, drainage, and chemical exposure. | Improve shielding and drainage, change mounting, use compatible materials and sealing, control cleaning residue, and retest margin. |
| Works at sensor, not PLC | PNP/NPN mismatch, NO/NC logic, common wiring, voltage drop, connector pinout, damaged cable, input filter, scan, or program permissive. | Measure voltage at sensor output and PLC terminal; compare LEDs, input tag, filters, wiring diagram, commons, program logic, and pulse width. | Correct the electrical interface or control timing before changing the sensing principle. |
| Jam or downed bottle is missed | Single sensing height sees only part of the failure, bottles remain inside the beam, timer too short, or the failure occurs outside the zone. | Place representative failed bottles in every orientation and position; review zone coverage, occupancy timer, conveyor state, and line tracking. | Add a second height, area sensor, longer monitored zone, encoder logic, or vision according to the actual failure geometry. |
For a wider diagnostic sequence, use the XSZ Sensor Troubleshooting Guide.
RFQ and sample-test checklist
Send application data that allows a supplier to test the same problem you have.
A bottle, a short line video, and the real timing conditions are often more useful than a request for “a long-range bottle sensor.”
Bottle and inspection task
- Presence, count, gap, jam, position, level, cap, label, orientation, or defect
- PET, glass, HDPE, other plastic, or mixed bottle materials
- Clear, tinted, opaque, glossy, matte, metallic, labeled, or sleeved
- Minimum and maximum dimensions, wall, neck, cap, and label details
- Empty, filled, foamy, wet, cold, warm, carbonated, or pressurized states
- Representative pass, fail, and worst-case samples
Machine and timing
- Bottles per minute, pitch, conveyor speed, and minimum gap
- One- or two-side access, reflector space, and available mounting height
- Maximum sensing distance and distance tolerance
- Bottle wobble, rotation, guide rails, nearby metal, and moving background
- Acceleration, accumulation, touching bottles, stops, and restarts
- Required trigger point, reject distance, and reject confirmation
Electrical and environment
- Supply voltage, PNP or NPN, NO or NC, connector, cable, and PLC input
- Required discrete output, analog value, IO-Link, network, or vision data
- Temperature, vibration, ambient light, dust, moisture, steam, and condensation
- Washdown method, water pressure, temperature, chemicals, and cleaning frequency
- Housing, lens, reflector, seal, and cable material requirements
- Target false-reject, missed-detection, maintenance, and fault-response criteria
Let XSZ review the bottle, sensing path, and timing window before model selection.
Send bottle photos or samples, a short machine video, line speed, minimum gap, mounting drawing, output requirements, and cleaning conditions. We can compare suitable photoelectric and fiber optic approaches and identify what still needs an application test.
Frequently asked questions
Questions about sensors for bottle detection
What is the best sensor for detecting clear plastic or glass bottles?
Start with a photoelectric sensor specifically documented for transparent objects, often a clear-object retro-reflective arrangement with the specified reflector. Test every bottle state, including empty and filled, clear and tinted, labeled and unlabeled, wet and dry, stable and wobbling. Opposed ultrasonic sensing is another candidate when optical behavior varies and the machine provides a suitable acoustic path.
Can a standard photoelectric sensor detect a transparent bottle?
It may switch on one sample, but stable production performance should not be assumed. Clear curved walls can transmit, refract, and reflect the beam, sometimes leaving too little reliable change for an ordinary sensor. Use a model and optical arrangement documented for transparent objects, then validate signal margin with the real bottle, reflector or background, line speed, gap, contamination, and temperature.
Is ultrasonic better than photoelectric for bottle detection?
Neither is universally better. Ultrasonic detection does not depend on bottle color or optical transparency, but beam width, dead zone, response time, contour, airflow, nearby surfaces, and minimum gap may matter. Photoelectric sensing can offer a smaller optical spot and fast product-specific responses, but clear, glossy, wet, or irregular bottles need the correct optical mode. Compare both against the actual geometry and timing.
How do I calculate the sensor response needed for a fast bottle line?
First calculate conveyor speed as bottles per minute multiplied by bottle pitch and divided by 60. Then calculate the available gap window as minimum gap divided by conveyor speed. Compare that time with sensor response and release, output delay, input filter, PLC scan and logic, and keep additional margin for beam width, bottle wobble, acceleration, and mechanical tolerance. Throughput alone is not enough.
What sensor detects liquid level through a bottle?
Depending on the bottle and liquid, start with capacitive through-wall point-level sensing, an optical or fiber optic level arrangement, top-down ultrasonic sensing, or machine vision. Wall thickness, dielectric properties, foam, bubbles, sloshing, condensation, label coverage, product recipe, speed, and required tolerance determine the better method. A moving bottle may also need a separate trigger window.
What sensor checks whether a bottle cap is present?
A photoelectric sensor can check a stable cap profile at a known height. An inductive sensor can check a metal cap or foil feature. A color or contrast sensor can detect a repeatable printed mark. Use machine vision when cap seating, tilt, orientation, color, seal, label, or multiple conditions must be evaluated. Test missing, loose, tilted, partially seated, and wrong-cap samples.
How can I stop a bottle sensor from double-counting?
Find where the extra transition is created. Common causes include the neck, body, ribs, seam, label edge, reflective highlight, bottle wobble, a wide beam, or PLC edge logic. Observe the raw sensor output or a high-speed PLC trace, move the sensing height to a stable body zone, improve bottle guidance, narrow the field if appropriate, and use only enough debounce to reject the unwanted transition without hiding the minimum bottle gap.
What information should I send for a bottle detection sensor recommendation?
Send the exact inspection task, bottle material, color, dimensions, empty and filled states, labels and caps, representative samples, bottles per minute, pitch, minimum gap, sensing distance, mounting access, machine photos or video, supply voltage, PNP or NPN requirement, output logic, environment, washdown details, and required fault behavior. Include the worst bottle and failure samples rather than only the normal product.
Evidence and media
Technical references and image credits
Technical references
- OMRON E3ZM-B Transparent Object Sensor — dedicated transparent PET, resin, and glass detection methods.
- OMRON E3ZM-B Specifications — model-specific targets, reflector range, response, enclosure ratings, and application notes.
- OMRON E3S-DB Clear Object Detection — transparent glass, PET, film, and tray applications.
- Banner Clear Container Detection — controlled optical path, teaching, attenuation, and compensation concepts.
- Banner Opposed Ultrasonic Bottle Detection — acoustic beam interruption for clear containers.
- Pepperl+Fuchs Retroreflective Sensor and Reflector FAQ — clear-object signal change, polarization, reflector, and shiny-target considerations.
- ifm Capacitive Level Installation Guidelines — dielectric, viscosity, foam, turbulence, speed, and installation factors.
- SICK Bottle Fill-Level Detection — moving-bottle trigger windows and foam-handling example.
Image credits
- Bottling-line hero: Ben Young / Pexels.
- Clear water bottles on factory conveyor: Vladimir Srajber / Pexels.
- Glass bottles on production line: Mark Stebnicki / Pexels.
- Industrial electrical control panel: Magda Ehlers / Pexels.
- Industrial photoelectric sensor image: XSZ Sensor.
Manufacturer examples demonstrate sensing principles and product-specific capabilities; they are not universal performance claims. Final selection should follow the exact sensor datasheet, the actual bottle sample test, the machine timing study, and applicable food, beverage, packaging, electrical, and machine-safety requirements.